
Carroll Painting · Family-owned since 1988
A room-by-room painting plan for a Peyton home.
A multi-room interior estimate is easier to understand when each room has its own surface list. This real Peyton proposal in ZIP 80831 separates the living room, office, hallways, bedrooms, kitchen and dining area, and laundry room, with an important difference in the laundry scope.
Based on an actual Carroll Painting proposal, its recorded conversation and photos attached to that same estimate. These are planning photographs; client identities, exact addresses and prices are omitted.
Most room entries list walls, ceilings and baseboards. The laundry entry lists walls and ceilings, without listing baseboards. The proposal also names two-coat wall and ceiling applications and a separate trim product. The useful next step is to confirm those room boundaries and surface assignments during the walkthrough.
A Carroll Painting project note · Reviewed October 11, 2026
Start with the room inventory
What does a room-by-room interior painting estimate clarify?
This proposal turns a broad interior project into eight named entries. The room list makes it possible to compare the living room with the office, hallways and bedrooms instead of relying on a single phrase such as “paint the interior.” Each entry pairs an area with a surface list. That is a useful starting point for deciding what you want changed in your own Peyton home.
The inventory includes a primary bedroom and bathroom in one entry, and the dining room and kitchen area in another. Those grouped labels deserve a walkthrough: identify the actual room limits, transitions and connecting surfaces. A room name can be clear to someone standing in the home and less clear to someone reading the proposal later. Ask the family to connect the written entry to the space you are reviewing.
Use the room list below as an example of a documented scope, rather than a package every home must purchase. Your project may involve fewer rooms, different surfaces or a different combination. The practical benefit is that you can point to a specific entry when asking what is included, what should remain, or how a change affects the selected work.
| Room or item | Surfaces recorded |
|---|---|
| Living room | Walls, ceilings, baseboards |
| Office | Walls, ceilings, baseboards |
| Hallways | Walls, baseboards, ceilings |
| Bedroom 2 | Walls, ceilings, baseboards |
| Bedroom 3 | Walls, ceilings, baseboards |
| Primary bedroom and bathroom | Walls, ceilings, baseboards |
| Dining room and kitchen area | Walls, ceiling, baseboards |
| Laundry room | Walls, ceilings; baseboards not listed in this item |
Compare surfaces, not just room names
Why does the laundry room need its own baseboard question?
The laundry entry says walls and ceilings. Most of the other room entries also name baseboards. That difference is visible in the actual proposal, and it is worth resolving before treating every room as identical. A general paragraph about trim does not by itself answer whether a surface absent from a particular room entry has been selected.
For your own estimate, ask: “Are the laundry baseboards part of this work, or are we keeping them as they are?” Then ask the same question wherever the room list changes. If a surface should be added, have the agreed scope identify it. If it should remain, make that boundary clear as well. This is more useful than assuming the shortest room description inherits every surface named elsewhere.
The proposal wording does not establish why baseboards were omitted from the laundry item. The story therefore keeps that as a scope question. The homeowner’s intended choice and the selected proposal are what should govern the work. Careful reading helps a family avoid a small room becoming a source of avoidable uncertainty.
Make the surfaces visible
How do the project photos help a multi-room walkthrough?
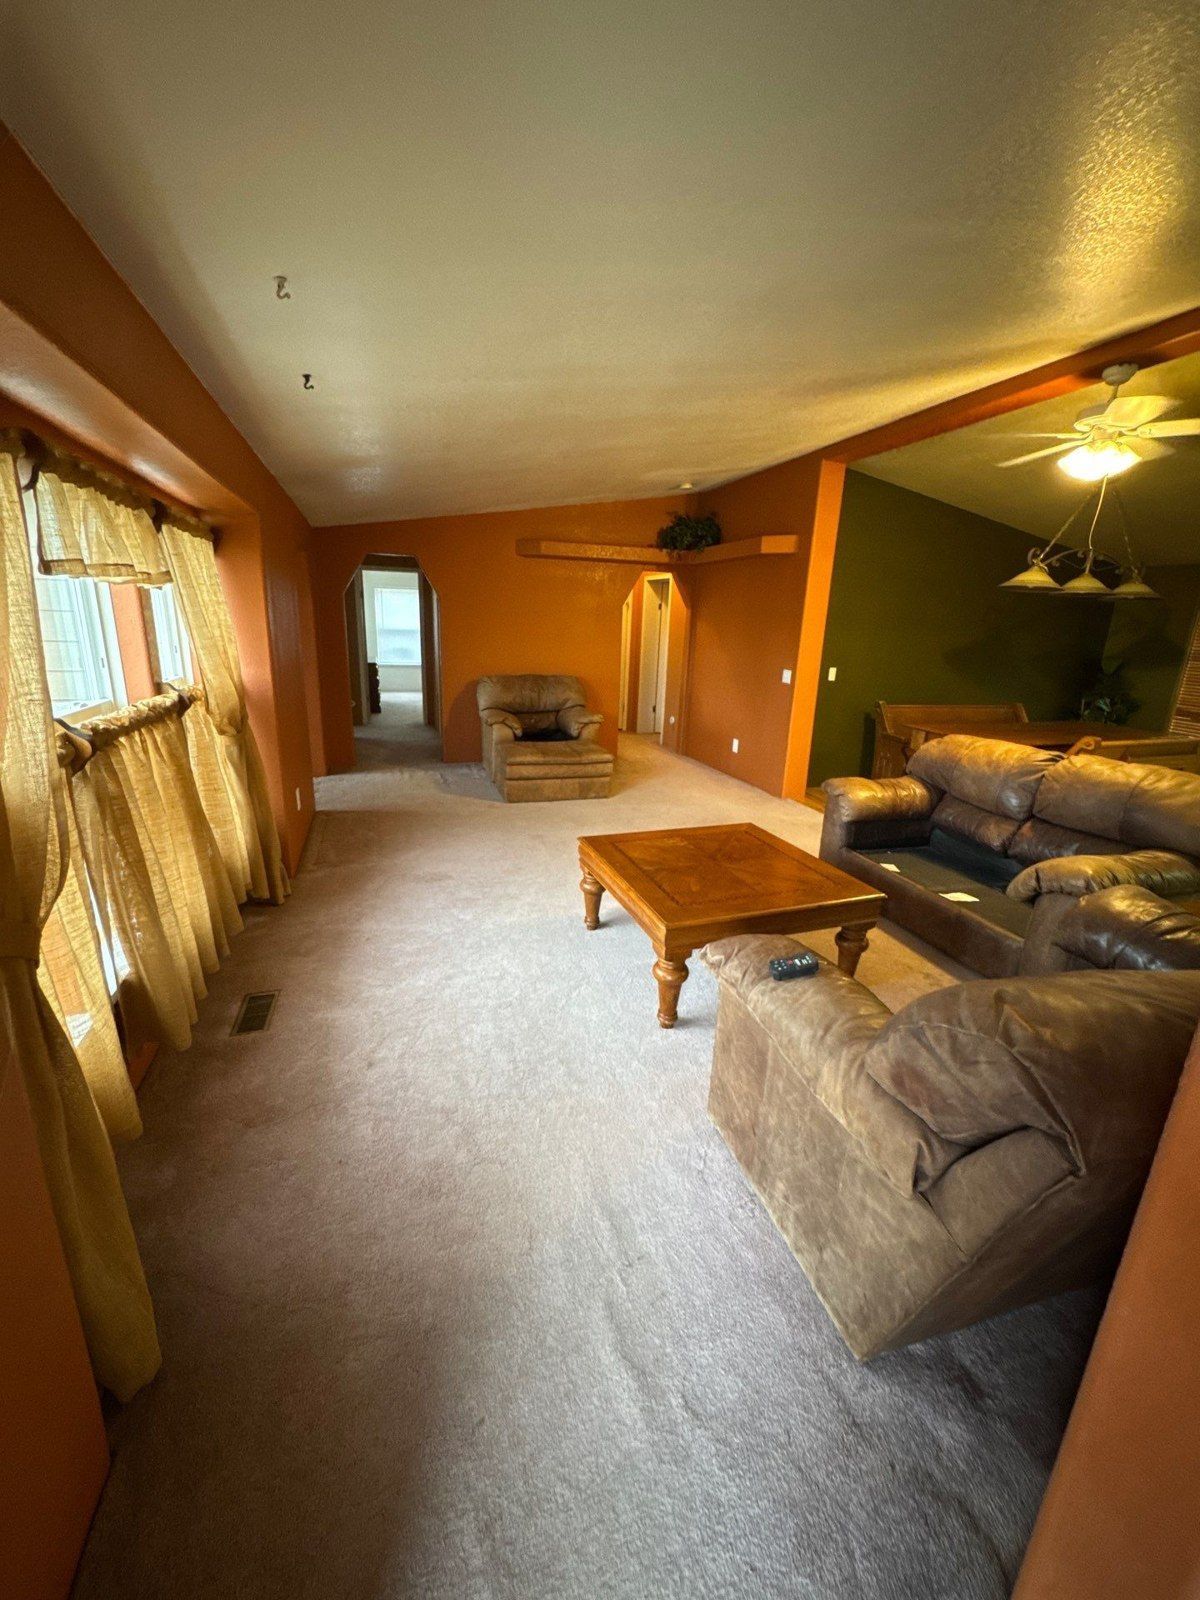
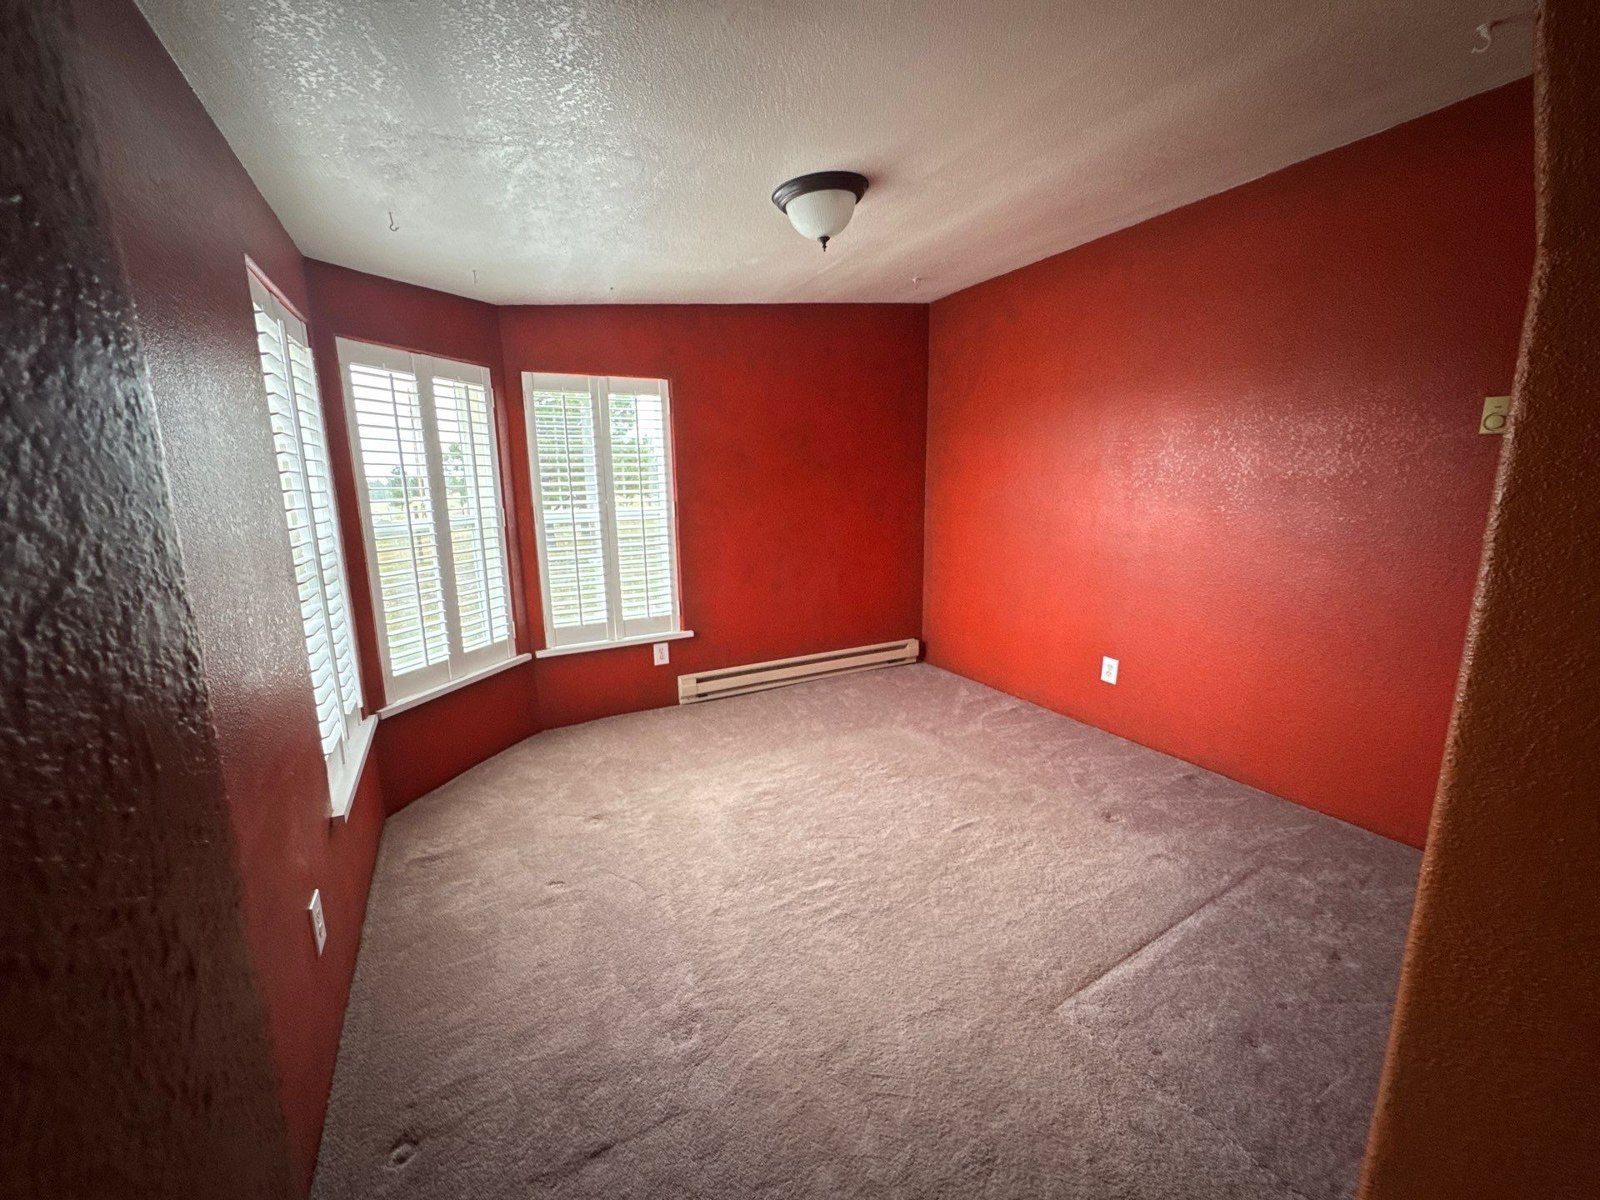
The attached photo set shows connected living areas, hallways, bedrooms and existing finishes. The two photographs on this page belong to this same estimate. One gives the wider furnished living-area context; another shows an existing room with strongly colored walls and a light ceiling. They help explain why a room inventory and a surface inventory are both useful.
Look at the boundaries between wall planes, ceilings, baseboards and adjoining rooms. Ask where one scope entry ends and the next begins. Identify finishes you want retained, and explain which color changes you are considering. A photograph can support that conversation, but a surface appearing in a photograph is not automatically included in the painting scope.
Keep the photos with the agreed room list when decisions change. If you decide to include another area or preserve a particular finish, connect that choice to an entry or a marked image. These photographs document the home considered for the estimate. They are not presented as a completed Carroll makeover or a before-and-after comparison.
Real project context
Assign products to the selected work
Which paint products and coat counts were recorded?
The preparation and application section specifies two coats of Sherwin-Williams Cashmere Interior Paint for walls. It names the same product as the walls for the ceiling application, also with two coats. For trim, the proposal names two coats of Sherwin-Williams Emerald Interior. Those are recorded proposal specifications, not a substitute for confirming the exact final product and finish for your own surfaces.
Ask for the agreed color and sheen by surface: walls, ceilings and the selected baseboards. If the proposal refers to a product family, confirm the precise product being used and where it applies. The same product reference for walls and ceilings does not, on its own, establish that every surface will have the same color or sheen. Those choices belong in a clear finish schedule.
The photographs show existing color differences, but the record does not establish a final color selection or a special primer schedule for every colored wall. Bring those questions to the in-person estimate. The family can review the surfaces in the actual home, then connect any additional preparation or coverage requirements to the selected work.
Plan around the home
What protection and preparation were included?
The proposal describes protecting floors and furniture with drop cloths and plastic sheets, filling cracks and nail holes as needed, cleaning and sanding glossy surfaces and trim as necessary, removing flaking paint, and priming raw materials selected for painting. These steps should be read alongside the room and surface entries. They describe preparation for the work being purchased.
The furnished living-area photograph gives the protection discussion a real setting. Before your own project, identify furniture that stays, items you can move, and routes you need to use. Discuss the rooms you rely on during the day and any areas that require a specific access arrangement. The estimate photos show context; they do not establish a complete household access schedule.
The written cleanup section says job-related debris is addressed daily, materials are organized, and masking remains while it is still in use. Ask what to expect between workdays and how that fits the occupied rooms. A good preparation conversation links the selected surfaces with the practical use of the home throughout the project.
Keep kitchen scope specific
Does a kitchen room entry include cabinet painting?
The dining room and kitchen item lists walls, ceiling and baseboards. It does not list a cabinet refinishing process or a cabinet inventory. That distinction matters when planning a kitchen refresh: room painting and cabinet painting can involve separate surfaces and separate scope decisions, even though they happen in the same space.
If cabinets are part of your goal, raise that directly during the walkthrough. Ask which doors, drawer fronts, boxes, exposed ends or other components would be selected, what finish is proposed, and how that work relates to the room painting. Those are questions for an additional cabinet scope; they are not cabinet services established by this room-painting entry.
If the cabinets remain, identify the finish you want protected and consider it alongside the proposed wall colors. The useful planning step is to give each surface a clear role: change it, preserve it, or review it separately. You can explore the Carroll cabinet project notes for more examples of component inventories and finish choices before your estimate.
Real project context
Turn the list into a shared plan
What should you confirm before selecting a multi-room project?
Peter’s recorded messages invite the homeowner to ask questions and request more detail before moving forward. The reviewed record contains the room-by-room proposal and that invitation to connect. It does not document a completed painting outcome. The practical takeaway is to use the estimate as a working reference while selections are being clarified.
Confirm the room inventory, the surface list for each room, the finish schedule, and protection and access arrangements. Resolve the laundry baseboard question and any proposed additions rather than leaving them implied. If you change the project, keep the selected version aligned with the photos and room names used during the walkthrough.
The proposal also describes a final walkthrough to address questions and needed touch-ups. Tie that review to the agreed room and surface list. For a similar Peyton interior project, begin with the rooms you want changed and the finishes you want to retain, then book a free in-person estimate so the family can review those details in your home.
Bring this to your walkthrough
A clear plan starts with four checks.
Room inventory
Name the areas and confirm boundaries between grouped and connected spaces.
Surface inventory
Review walls, ceilings and baseboards separately, including the laundry item.
Finish and protection
Assign products, colors and sheens and discuss furniture, floors and usable routes.
Selected proposal
Keep the agreed room list and photos together when choices change.
Questions homeowners ask
Before your own project.
What surfaces were listed in most rooms?
Most room entries name walls, ceilings and baseboards. The laundry room entry lists walls and ceilings. Read each room item rather than assuming every area is identical.
Were laundry room baseboards included?
They are not listed in the laundry item. Confirm the intended selection with the family and have the agreed proposal make it clear. The wording alone does not establish the homeowner’s reason.
Did the kitchen entry include cabinet painting?
The kitchen and dining item names walls, ceiling and baseboards. It does not establish a cabinet refinishing scope. Request a separate cabinet review if that is part of your project.
Were walls and ceilings specified with the same product?
The proposal names Cashmere Interior Paint for walls and the same product as the walls for ceilings, with two coats. Confirm the precise product, color and sheen by surface in the selected finish schedule.
How were furniture and floors addressed?
The preparation section describes drop cloths and plastic sheets for protection, along with daily cleanup and organized materials. Discuss the actual furniture and access arrangements for your home.
Are these photographs from this Peyton project?
Yes. Both photographs are attached to the same estimate reviewed for this story. They provide planning context and are not presented as a completed result.
How do I prepare for a multi-room painting estimate in Peyton?
List the rooms, identify surfaces you want changed or retained, and bring questions about color, baseboards, cabinets and household access. Book a free in-person estimate with Carroll Painting.
Make the plan fit your home.
Bring your questions, the surfaces you want to change and the details you want to preserve. The Carroll family can review them with you during a free in-person estimate.
Book Your Free EstimateExplore interior painting or more interior and cabinet project stories.